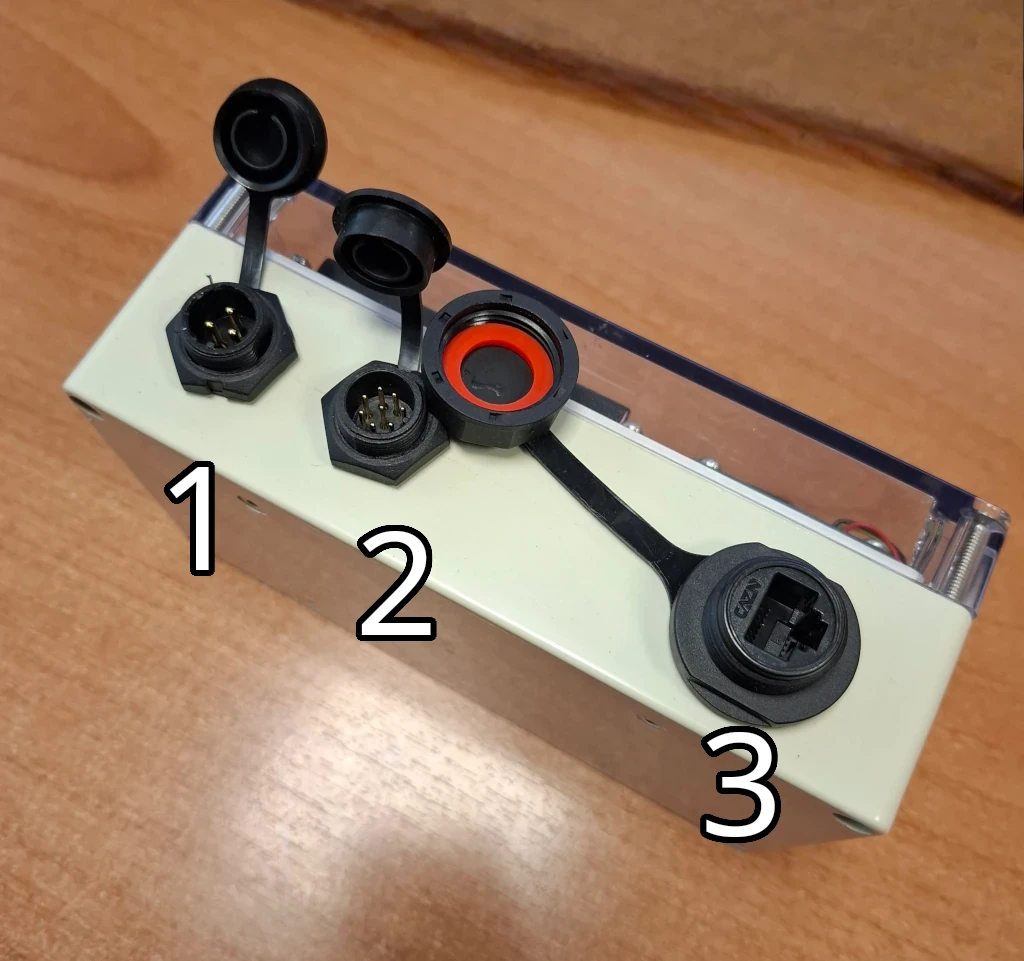
1. Connector description
- Power supply 5V 2A DC
- Two monitoring channels 5-24V
- Internet connection via RJ-45
Cables 1 and 2 are included.

1.1. Power supply
| Color | Function |
| Orange or White | +5V DC |
| Black or Blue | GND |
1.2. Monitoring channels
| Channel | Color | Function |
| 1 | Orange | From 5V to 24V DC |
| 1 | Black or Brown | GND |
| 2 | Yellow or Green | From 5V to 24V DC |
| 2 | White or Blue | GND |
2. Device start-up
- Connect the device to the power supply according to section 1.1.
- Connect to the internet using cable 3.
- Go to the website connect.c-syst.com, log in (username and password are provided upon purchase of the device).
- On the website, click the “Add device” button.
- Enter the device serial number (displayed in the first line on the device screen).
- Enter the key (displayed in the second line on the device screen).
- Click the “Add” button, and the device will appear in the list.
3. Accessing device settings
- Go to the website connect.c-syst.com
- Select the device from the list, click on it.
- Click “Connect to Device.”
- Wait for the connection (up to 1 minute), after which you will access the device settings.
3. Connecting to Wi-Fi
- In the device settings, go to the “Network” section.
- In the “Wi-Fi” category, click the “Update Wi-Fi List” button.
- Select the access point from the list that you want to connect the device to.
- Enter the password and click the “Connect” button.
- Disconnect the internet connection cable.
- Wait 10 seconds, then restart the device (by disconnecting the power).
4. Monitoring connection
- Connect the monitoring power supply to the channels according to section 1.2.
- In the device settings, go to the “Status” category.
- By applying or disconnecting power from the channels, check the connection with the device (when power is applied, “Current Value” should change to the value from “Activation Value”).
